Shades of Grey
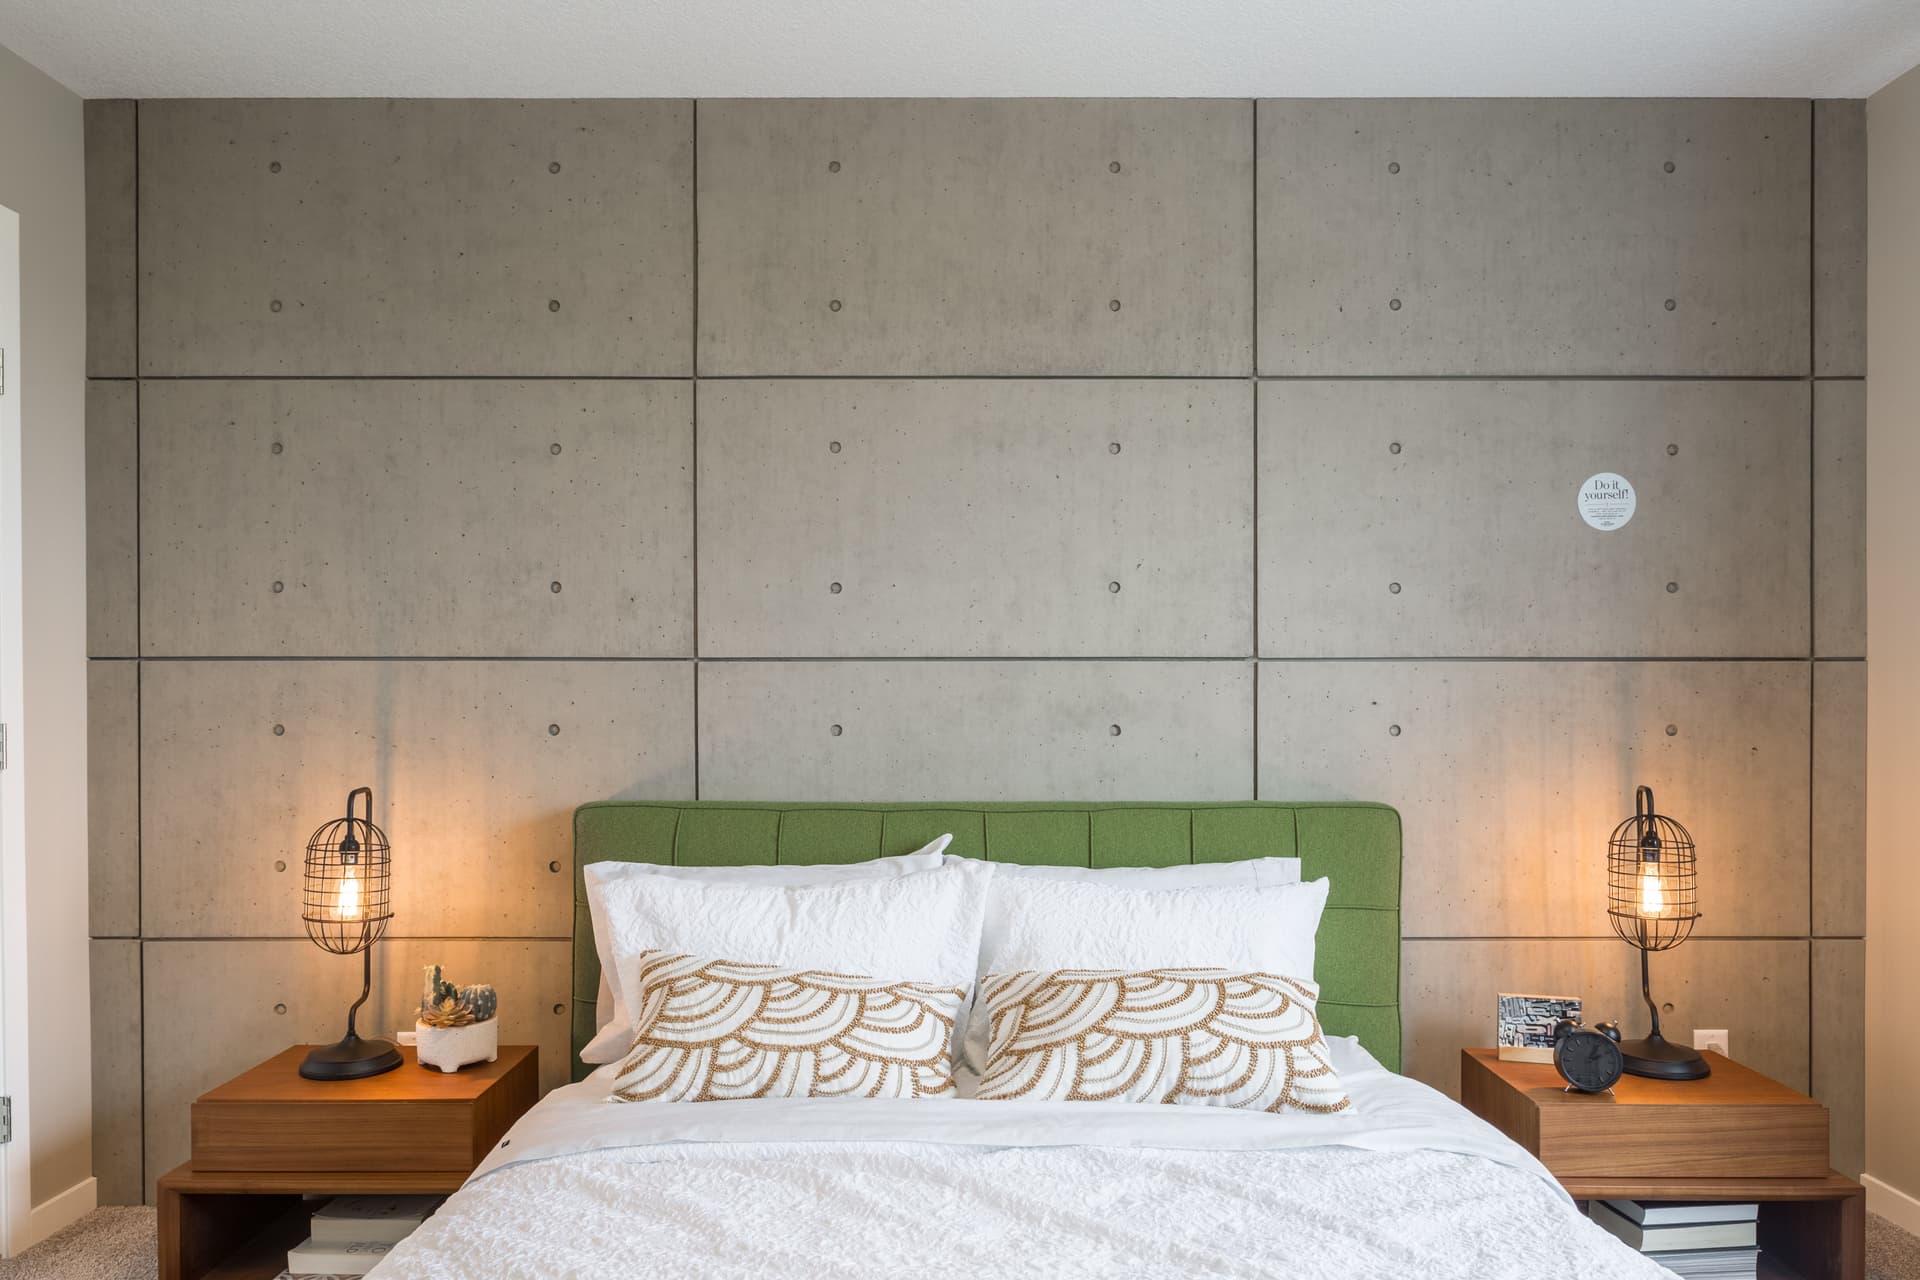
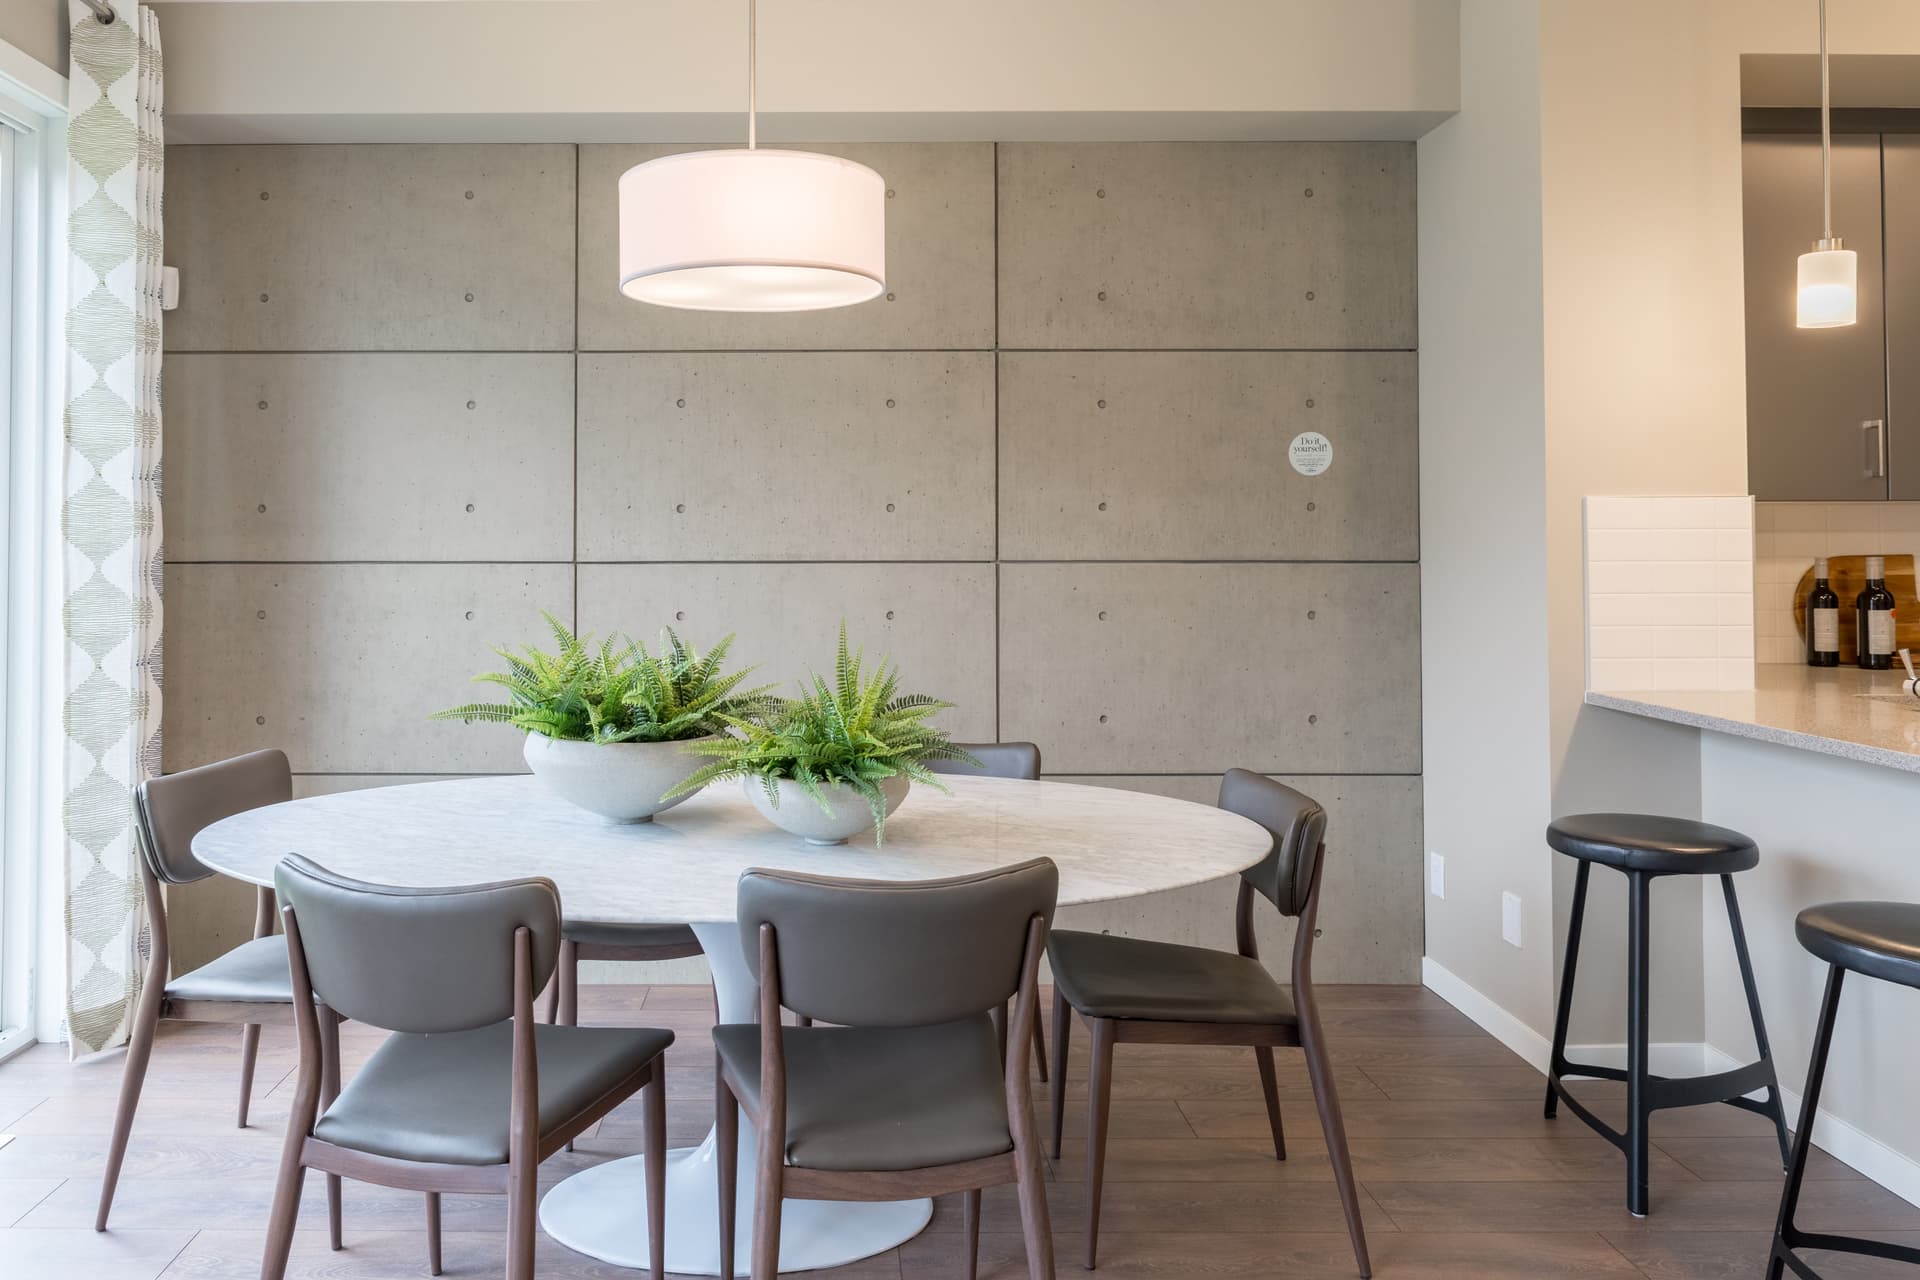
A sleek concrete feature wall can be easily achieved using pre-fabricated concrete cladding and a few simple tools, transforming a room with a modern, clean aesthetic in no time.
A sleek concrete feature wall sets the tone for new beginnings
For those who love clean, contemporary lines, a concrete feature wall is a dream solution. But while mixing up troughs of sand and clay may seem daunting to the do-it-yourselfer, there is an alternative that looks amazingly realistic. Pre-fabricated concrete cladding adds that designer look easily and with a minimum of mess, allowing you to transform a room into minutes. We love how it looks in the great room of our new Vios show home in Mahogany! Here’s how we did it.
- Choose your feature wall and pick your cladding. There are several concrete panel-type claddings on the market. We used Urban Concrete (www.hourwall.com) in washed grey because of its authentic look, texture and feel.
- Gather Together Your Tools. Don’t let the list of tools deter you; creating a stunning wall is a relatively simple process. Here’s what you’ll need:
- Miter Saw and/or a Table Saw
- Drill
- Measuring Tape, Metal Square, Level, Ruler and Pencil
- 10 oz. Caulking Gun
- Utility Knife
- Safety Glasses, Earplugs and a Dust Mask
- Create a pattern: Measure the feature wall and then define the wall perimeter in tape on a flat floor surface. Next, lay all of the panels out and create a pattern that matches the configuration of the feature wall.
- Cut Panels to Size. Measure and mark panels from the backside using a measuring tape and pencil, using a straight edge to make a cutting line. Then use a handsaw or a miter saw to make the cut. To cut outlet and fixture holes, use a hole saw or high speed drill and then finish with a utility knife for precision.
- Installation. Make sure that the wall surface is clean and free from moisture, loose materials and oils. Use a wet sponge and then wipe dry with a clean, lint-free cloth. Begin from the right, upper edge of the wall and apply panels crosswise, working towards the left. Fit the first panel snugly against the right side of the wall (you will need to cut the edge) and work towards the left, fitting the panels together as tightly as possible to minimize any seaming or gaps. Use a level to ensure that the foundation row is straight.
- Fasten the panels. Use finishing nails applied to inconspicuous areas like the indents, four face circles and top and side shiplaps. When finished, if any nail heads peek out, dab on a touch of paintable caulking. For extra adhesion, consider using a high tack, heavy duty construction adhesive as well, but first lightly scuff the back of the panels with a utility knife, carpenter’s rasp or sandpaper to provide extra grip.